> ## Documentation Index
> Fetch the complete documentation index at: https://auth0.generaltranslation.app/llms.txt
> Use this file to discover all available pages before exploring further.

> Learn how to configure Rich Authorization Requests (RAR) for a resource server.

# Configure Rich Authorization Requests (RAR)

Using [Rich Authorization Requests (RAR)](https://datatracker.ietf.org/doc/html/draft-ietf-oauth-rar), clients can request and obtain <Tooltip tip="Fine-grained Authorization (FGA): Auth0 product allowing individual users access to specific objects or resources." cta="View Glossary" href="/docs/glossary?term=fine-grained+authorization">fine-grained authorization</Tooltip> data from <Tooltip tip="Resource Owner: Entity (such as a user or application) capable of granting access to a protected resource." cta="View Glossary" href="/docs/glossary?term=resource+owners">resource owners</Tooltip>, such as end users, during the [Authorization Code Flow](/docs/get-started/authentication-and-authorization-flow/authorization-code-flow) and [Client-Initiated Backchannel Authentication Flow](/docs/get-started/authentication-and-authorization-flow/client-initiated-backchannel-authentication-flow).

In a Rich Authorization Request, the `authorization_details` parameter is a JSON array of objects. You can render the `authorization_details`, containing transaction details, in a consent prompt to the user in <Tooltip tip="Multi-factor authentication (MFA): User authentication process that uses a factor in addition to username and password such as a code via SMS." cta="View Glossary" href="/docs/glossary?term=Multi-factor+Authentication">Multi-factor Authentication</Tooltip> challenges.

To configure Rich Authorization Requests for a <Tooltip tip="Resource Server: Server hosting protected resources. Resource servers accept and respond to protected resource requests." cta="View Glossary" href="/docs/glossary?term=resource+server">resource server</Tooltip>, you must:

1. [Configure the consent policy for the resource server](#configure-consent-policy-for-the-resource-server).
2. [Register `authorization_details` types](#register-authorization-details-types) for the resource server.
3. [Set the customized consent prompt](#set-customized-consent-prompt) to render the `authorization_details`.

## Configure consent policy for the resource server

The resource server’s consent policy determines when and how Auth0 renders the Rich Authorization Request and shows the consent prompt to the user.

The table below summarizes Auth0's `standard` consent policy behavior for a resource server that accepts Rich Authorization Requests:

<table class="table">
  <thead>
    <tr>
      <th><strong>Is it a Rich Authorization Request?</strong></th>
      <th><strong>MFA Required?</strong></th>
      <th><strong>Consent policy is <code>standard</code> or undefined</strong></th>
    </tr>
  </thead>

  <tbody>
    <tr>
      <td>No</td>
      <td>No</td>
      <td>Standard consent is shown unless there is a grant that includes the requested access.</td>
    </tr>

    <tr>
      <td>Yes</td>
      <td>No</td>
      <td>Customized consent is shown.</td>
    </tr>

    <tr>
      <td>Yes</td>
      <td>Yes, with an authentication factor that is not a push notification</td>
      <td>Customized consent is shown after the user fulfills the MFA challenge.</td>
    </tr>

    <tr>
      <td>Yes</td>
      <td>Yes, with a push notification factor</td>
      <td>No consent is shown. The consent is handled in the mobile application that receives the push notification challenge.</td>
    </tr>
  </tbody>
</table>

You can set the consent policy for a resource server with the [Auth0 Dashboard](https://manage.auth0.com/) or [Management API](https://auth0.com/docs/api/management/v2).

<Tabs>
  <Tab title="Auth0 Dashboard">
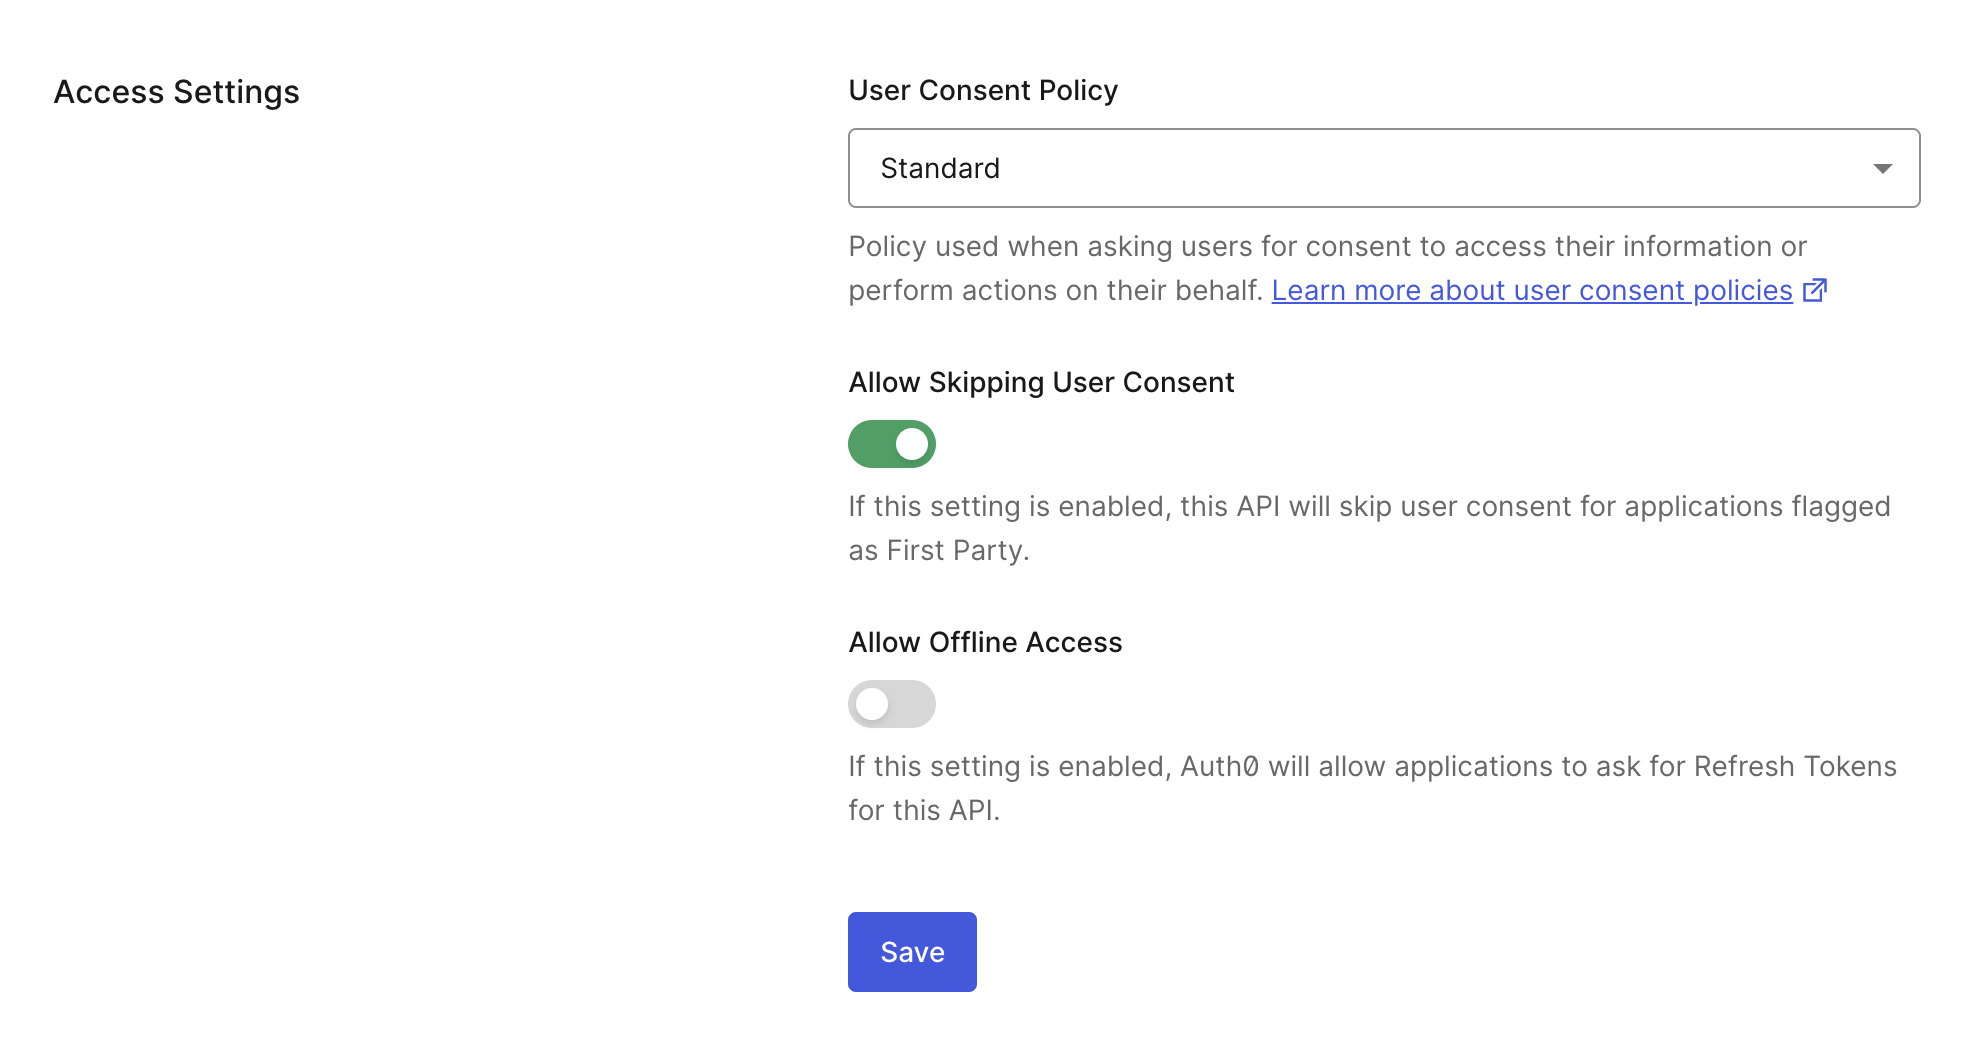
    Set the consent policy in your API settings using the Auth0 Dashboard.

    1. Navigate to [Auth0 Dashboard > Applications > APIs](https://manage.auth0.com/#/apis).
    2. Select the **Settings** tab.
    3. Under **Access Settings**, choose the **Standard** consent policy.
    4. Save your changes.

    <Frame>
      <img src="https://mintcdn.com/generaltranslationinc/RMdEvk9xid_26wCJ/docs/images/cdy7uua7fh8z/3gr8Sf98gh8CUkjnlodNk/cf33985b1e5b62082d46e4f5c8bbed6f/Screenshot_2025-03-31_at_8.22.45_PM.png?fit=max&auto=format&n=RMdEvk9xid_26wCJ&q=85&s=bf74cf68e51fdb48e66479afa00162c8" alt="Dashboard > Applications > APIs > Settings > Access Settings" data-og-width="1976" width="1976" data-og-height="1046" height="1046" data-path="docs/images/cdy7uua7fh8z/3gr8Sf98gh8CUkjnlodNk/cf33985b1e5b62082d46e4f5c8bbed6f/Screenshot_2025-03-31_at_8.22.45_PM.png" data-optimize="true" data-opv="3" srcset="https://mintcdn.com/generaltranslationinc/RMdEvk9xid_26wCJ/docs/images/cdy7uua7fh8z/3gr8Sf98gh8CUkjnlodNk/cf33985b1e5b62082d46e4f5c8bbed6f/Screenshot_2025-03-31_at_8.22.45_PM.png?w=280&fit=max&auto=format&n=RMdEvk9xid_26wCJ&q=85&s=f6368384a6eba780cd9cad3707cff442 280w, https://mintcdn.com/generaltranslationinc/RMdEvk9xid_26wCJ/docs/images/cdy7uua7fh8z/3gr8Sf98gh8CUkjnlodNk/cf33985b1e5b62082d46e4f5c8bbed6f/Screenshot_2025-03-31_at_8.22.45_PM.png?w=560&fit=max&auto=format&n=RMdEvk9xid_26wCJ&q=85&s=098841e4c3e8a83049eb40f61d3be206 560w, https://mintcdn.com/generaltranslationinc/RMdEvk9xid_26wCJ/docs/images/cdy7uua7fh8z/3gr8Sf98gh8CUkjnlodNk/cf33985b1e5b62082d46e4f5c8bbed6f/Screenshot_2025-03-31_at_8.22.45_PM.png?w=840&fit=max&auto=format&n=RMdEvk9xid_26wCJ&q=85&s=76258a534f2d584be5703b52bf39b703 840w, https://mintcdn.com/generaltranslationinc/RMdEvk9xid_26wCJ/docs/images/cdy7uua7fh8z/3gr8Sf98gh8CUkjnlodNk/cf33985b1e5b62082d46e4f5c8bbed6f/Screenshot_2025-03-31_at_8.22.45_PM.png?w=1100&fit=max&auto=format&n=RMdEvk9xid_26wCJ&q=85&s=d3c30fa575cd9d4cd4af5b031464af72 1100w, https://mintcdn.com/generaltranslationinc/RMdEvk9xid_26wCJ/docs/images/cdy7uua7fh8z/3gr8Sf98gh8CUkjnlodNk/cf33985b1e5b62082d46e4f5c8bbed6f/Screenshot_2025-03-31_at_8.22.45_PM.png?w=1650&fit=max&auto=format&n=RMdEvk9xid_26wCJ&q=85&s=683c0d9a954e095e850a2b15a84a1e84 1650w, https://mintcdn.com/generaltranslationinc/RMdEvk9xid_26wCJ/docs/images/cdy7uua7fh8z/3gr8Sf98gh8CUkjnlodNk/cf33985b1e5b62082d46e4f5c8bbed6f/Screenshot_2025-03-31_at_8.22.45_PM.png?w=2500&fit=max&auto=format&n=RMdEvk9xid_26wCJ&q=85&s=36c2cd49686fc1a25390ff16914c1faf 2500w" />
    </Frame>
  </Tab>

  <Tab title="Management API">
    To set the consent policy for a resource server or API using the Management API, send a `PATCH` request to the [Update a resource server](https://auth0.com/docs/api/management/v2/resource-servers/patch-resource-servers-by-id) endpoint. In the `PATCH` request, set the `consent_policy` to `standard`:

    ```bash wrap lines theme={null}
    curl --location --request PATCH 'https://$tenant/api/v2/resource-servers/$resource-server-id' \
      --header 'Authorization: Bearer $management_access_token' \
      --header 'Content-Type: application/json' \
      --data-raw '{ "consent_policy": "standard" }'
    ```
  </Tab>
</Tabs>

## Register `authorization_details` types

The `type` field determines the customizable object fields. An `authorization_details` array may contain multiple entries of the same `type`.

You must register `authorization_details` types for a resource server, which is similar to registering allowed scopes.

### Auth0 Guardian app

If you’re using the Auth0 Guardian app, then the `authorization_details` types must use the Auth0 schema. The Auth0 schema has the following fields:

<table class="table">
  <thead>
    <tr>
      <th><strong>Field</strong></th>
      <th><strong>Description</strong></th>
      <th><strong>Example</strong></th>
    </tr>
  </thead>

  <tbody>
    <tr>
      <td><code>type</code></td>
      <td>Specifies the type of authorization request:<br /><ul><li><code>urn:auth0:schemas:authorization-details</code>: The Auth0 URN indicates that the request will use the Auth0 schema.</li><li><code>v1</code>: The schema version.</li><li><code>user-profile</code>: Customer-provided value indicating that the request is for user profile information.</li></ul></td>
      <td><code>urn:auth0:schemas:authorization-details:v1:user-profile</code></td>
    </tr>

    <tr>
      <td><code>instruction</code></td>
      <td>A human-readable message to the user approving the request.</td>
      <td><code>Please approve the request</code></td>
    </tr>

    <tr>
      <td><code>properties</code></td>
      <td>A JSON object containing the specific user attributes or claims being requested. Each key (e.g., <code>email</code>, <code>full\_name</code>) represents a particular user profile field:<br /><ul><li><code>display</code>: A boolean value that determines whether the property should be shown to the user in the consent dialog. If <code>true</code>, it will be displayed; if <code>false</code>, it's an internal-only property not meant for user view.</li><li><code>name</code>: The human-readable name for the property (e.g., "Email Address").</li><li><code>display\_order</code>: An integer that dictates the order in which properties will be shown in the consent dialog.</li><li><code>description</code>: An optional, short explanation of the property's purpose.</li><li>`value`: The actual data value for the property (e.g., "[user@example.com](mailto:user@example.com)", "John Doe"). The data type can vary (string, integer, boolean, etc.).</li></ul></td>
      <td>`"properties": { "stringPropertyForDisplay": { "display": true, "name": "A String:", "display_order": "1", "value": "Value 1"} }`</td>
    </tr>
  </tbody>
</table>

The following is an example `authorization_details` type with the Auth0 schema:

```json lines theme={null}
{
    "type": "urn:auth0:schemas:authorization-details:v1:user-profile",
    "instruction": "An instruction to the user",
    "properties": {
        "stringPropertyForDisplay": {
            "display": true,
            "name": "A String:",
            "display_order": "1",
            "value": "Value 1"
        },
        "numericPropertyForDisplay": {
            "display": true,
            "name": "A Number:",
            "display_order": "2",
            "description": "An optional description",
            "value": 100.00
        },
        "booleanPropertyForDisplay": {
            "display": true,
            "name": "A Boolean:",
            "display_order": "3",
            "value": true
        },
        "hiddenProperty": {
            "display": false,
            "value": "This value should not be displayed"
        }
    }
}
```

### Other notification channels

If you’re not using the Auth0 Guardian app, then the `authorization_details` types does not need to use the Auth0 schema. Instead, they must follow these requirements:

* Maximum 5Kb
* Must be valid JSON
* Must be an array of objects
* Maximum of 5 entries in the array
* Every object must have a `type` property (that is pre-registered on the API)
* Maximum of 10 properties per object
* Maximum character length of property names is 255
* Maximum character length of property value is 255
* Maximum of 5 levels of nested objects
* Property names can only contain the following characters: `a-zA-Z0-9_.-`

The following is an example `authorization_details` of type `money_transfer` that does not use the Auth0 schema. It contains the following object fields:

* `instructedAmount`: The amount of money in USD to be transferred.
* `sourceAccount`: The source bank account from which the money will be transferred.
* `destinationAccount`: The destination bank account to which the money will be transferred.
* `beneficiary`: The recipient of the money transfer.
* `subject`: The subject line of the money transfer.

```json lines theme={null}
{
  "type": "money_transfer", 
  "instructedAmount": {"amount": 2500, "currency": "USD"},   
  "sourceAccount": "xxxxxxxxxxx1234", 
  "destinationAccount": "xxxxxxxxxxx9876", 
  "beneficiary": "Hanna Herwitz", 
  "subject": "A Lannister Always Pays His Debts"
}
```

You can register `authorization_details` types with the [Auth0 Dashboard](https://manage.auth0.com/) or [Management API](https://auth0.com/docs/api/management/v2).

<Tabs>
  <Tab title="Auth0 Dashboard">
    To add `authorization_details` in the Auth0 Dashboard:

    1. Navigate to [Auth0 Dashboard > Applications > APIs](https://manage.auth0.com/#/apis).
    2. Select the **Permissions** tab.
    3. Under **Add an Authorization Details type**, you can add multiple `authorization_details` types for your resource server. Enter an `authorization_details` type
    4. Select the **+Add** option.

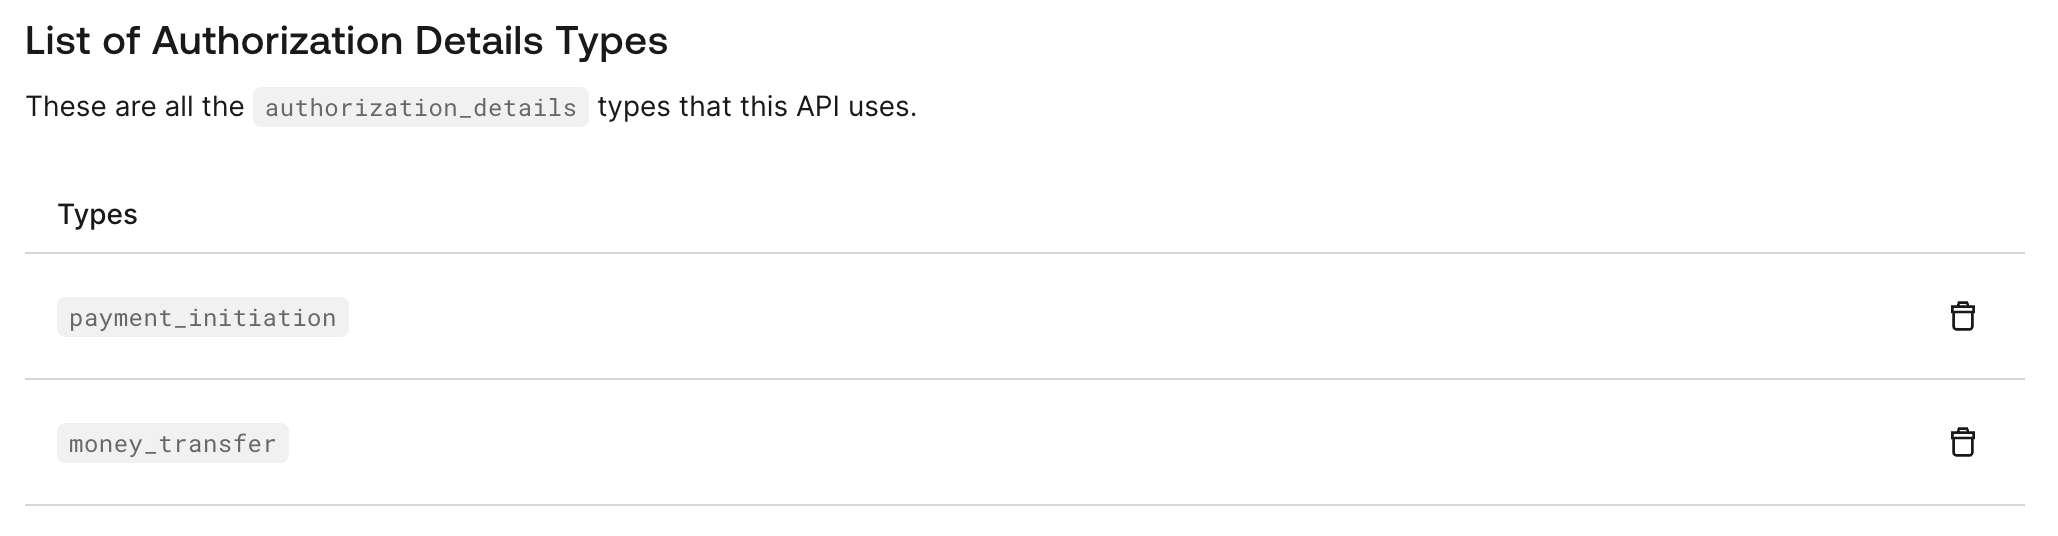
    You can see the `authorization_details` types for your resource server under **List of Authorization Details Types**:

    <Frame>
      <img src="https://mintcdn.com/generaltranslationinc/Q_4pAdRoZm2wi1v5/docs/images/cdy7uua7fh8z/6qRpmbZiqaU8pSFDuWzUAy/951c827a307791de8df9cecd8f817351/Screenshot_2025-04-07_at_3.45.36_PM.png?fit=max&auto=format&n=Q_4pAdRoZm2wi1v5&q=85&s=f7828d5f1558437b67bcf72c8ac079a5" alt="" width="2058" height="536" data-path="docs/images/cdy7uua7fh8z/6qRpmbZiqaU8pSFDuWzUAy/951c827a307791de8df9cecd8f817351/Screenshot_2025-04-07_at_3.45.36_PM.png" />
    </Frame>
  </Tab>

  <Tab title="Management API">
    To register  `authorization_details` types with an existing resource server, make a `PATCH` request to the [Update a resource server](https://auth0.com/docs/api/management/v2/resource-servers/patch-resource-servers-by-id) endpoint.

    The following code sample adds the `payment_initiation` and `money_transfer` types under `authorization_details` for a resource server:

    ```bash lines theme={null}
    curl --location --request PATCH 'https://$tenant/api/v2/resource-servers/$resource-server-id' \
      --header 'Authorization: Bearer $management_access_token' \
      --header 'Content-Type: application/json' \
      --data-raw '{
      "authorization_details": [{"type": "payment_initiation"}, {"type": "money_transfer"}]
      }'
    ```

    To create a new resource server with a registered `authorization_details` type, make a `POST` request to the `/resource-servers` endpoint.

    The following `POST` request creates a new resource server with `authorization_details` type `payment_initiation`:

    ```bash lines theme={null}
    curl --location --request POST 'https://$tenant/api/v2/resource-servers' \
      --header 'Authorization: Bearer $management_access_token' \
      --header 'Content-Type: application/json' \
      --data-raw '{
      "name": "Payments API",
      "identifier": "https://payments.api/",
      "consent_policy": "standard",
      "authorization_details": [{"type": "payment_initiation"}]
      }'
    ```
  </Tab>
</Tabs>

## Set customized consent prompt

You can render the `authorization_details` of a Rich Authorization Request in the consent prompt. To do so, configure the `customized-consent` prompt with the appropriate template partials.

You can set the customized consent prompt using the Auth0 CLI or Management API.

### Auth0 CLI

To configure the customized consent partials, run the `auth0 ul customize` command with the appropriate flags in your terminal:

```bash lines theme={null}
auth0 ul customize
```

To learn more, read the [auth0 universal-login customize documentation](https://auth0.github.io/auth0-cli/auth0_universal-login_customize.html).

### Management API

To configure the customized consent partials, make a `PUT` request to the `/prompts/customized-consent/partials` endpoint:

```bash lines theme={null}
curl --location --request PUT "https://$tenant/api/v2/prompts/customized-consent/partials" \
  --header "Authorization: Bearer $management_access_token" \
  --header "Content-Type: application/json" \
  --data '{
    "customized-consent": {
      "form-content": "<div style=\"font-size: 1.3em; font-weight: bold;\">Operation Details</div><hr style=\"margin: 10px 0;\"><div style=\"margin-bottom: 20px;\"></div><div style=\"font-weight: bold;\">Transaction Type</div><div>{{ transaction.params.authorization_details[0].type }}</div><div style=\"margin-bottom: 20px;\"></div><div style=\"font-weight: bold;\">Amount</div><div>{{ transaction.params.authorization_details[0].instructedAmount.amount }} {{ transaction.params.authorization_details[0].instructedAmount.currency }}</div><div style=\"margin-bottom: 20px;\"></div><div style=\"font-weight: bold;\">Recipient</div><div>{{ transaction.params.authorization_details[0].beneficiary }}</div><div style=\"margin-bottom: 20px;\"></div><div style=\"font-weight: bold;\">Destination Account</div><div>{{ transaction.params.authorization_details[0].destinationAccount }}</div><div style=\"margin-bottom: 20px;\"></div>"
    }
  }'
```

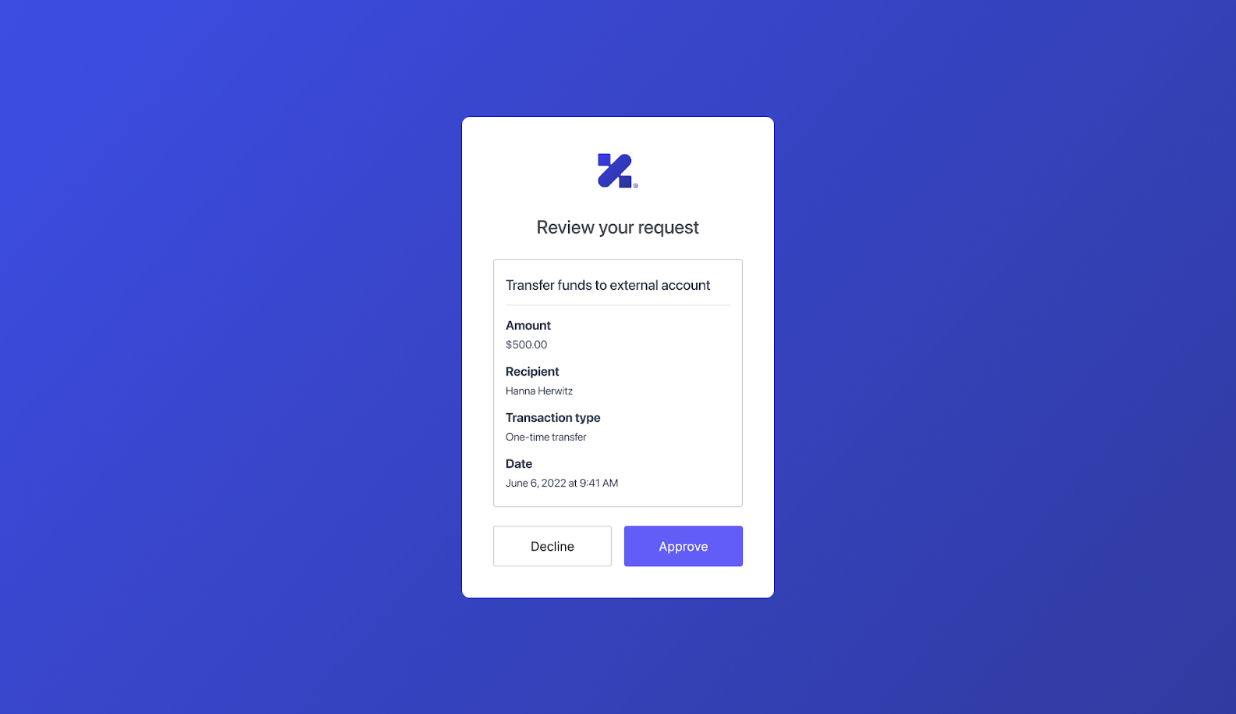
The customized consent template renders the `authorization_details` in the following consent prompt that Auth0 shows to the end user:

<Frame>
  <img src="https://mintcdn.com/generaltranslationinc/IhLUvTv5J5eZ1VeH/docs/images/cdy7uua7fh8z/9NdSMIBWrNI2kbPuaVpon/afc3dde316d5a3577d0d181e6046fa81/Screenshot_2025-03-31_at_3.24.40_PM.png?fit=max&auto=format&n=IhLUvTv5J5eZ1VeH&q=85&s=2fe3681b54041226109cfbf8658a7d4c" alt="" width="1236" height="714" data-path="docs/images/cdy7uua7fh8z/9NdSMIBWrNI2kbPuaVpon/afc3dde316d5a3577d0d181e6046fa81/Screenshot_2025-03-31_at_3.24.40_PM.png" />
</Frame>

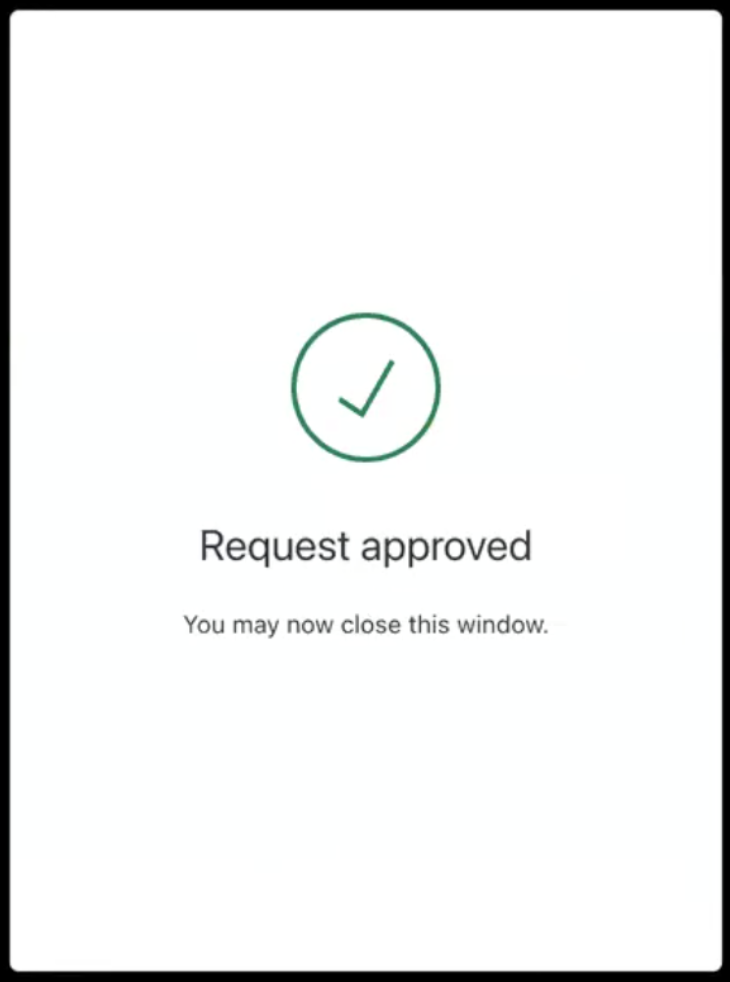
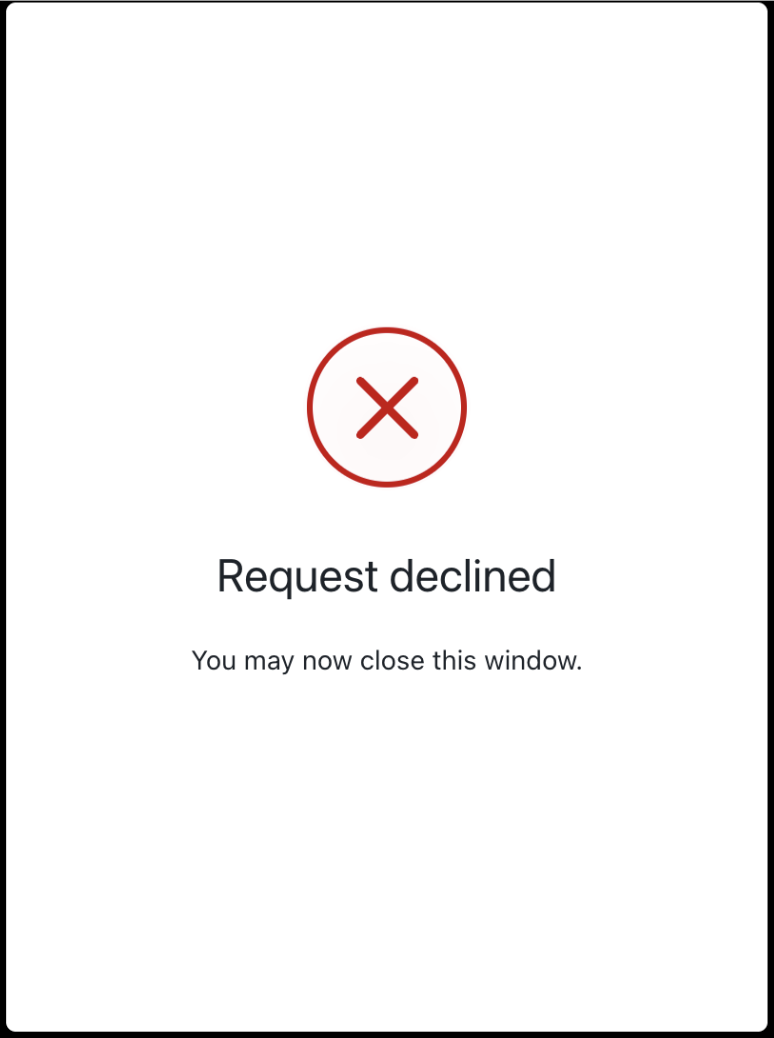
In the [email notifications with CIBA and RAR flow](/docs/get-started/authentication-and-authorization-flow/client-initiated-backchannel-authentication-flow/email-notifications-with-ciba), you need to customize the consent prompt to show the approval or rejection screens to the user:
<Frame>
  <img src="https://mintcdn.com/generaltranslationinc/md6b8ua1hdYa2pM7/docs/images/ciba/user_accepts_the_authentication_request.png?fit=max&auto=format&n=md6b8ua1hdYa2pM7&q=85&s=ff19dbb878a0ed96ecf19ce3b0924988" alt="User accepts the authentication request" style={{ width: '300px', height: 'auto' }} width="730" height="982" data-path="docs/images/ciba/user_accepts_the_authentication_request.png" />
</Frame>

<Frame>
  <img src="https://mintcdn.com/generaltranslationinc/md6b8ua1hdYa2pM7/docs/images/ciba/user_rejects_authentication_request.png?fit=max&auto=format&n=md6b8ua1hdYa2pM7&q=85&s=cb2422bad333a7c1450ec8d17accb26f" alt="User accepts the authentication request" style={{ width: '300px', height: 'auto' }} width="774" height="1038" data-path="docs/images/ciba/user_rejects_authentication_request.png" />
</Frame>

To learn more about how to customize the consent prompt, read:

* [Customize Universal Login Pages](/docs/customize/login-pages/universal-login/customize-templates)
* [Customize Universal Login with the No-Code Editor](/docs/customize/login-pages/universal-login/customize-themes)
* [Set partials for a prompt API documentation](/docs/api/management/v2/prompts/put-partials)